
Appearance
Exercise 10 (Optional): Query Data 360 Data in a Flow
In this exercise, you’ll create a flow that queries data in Data 360 and brings it into a Lightning record page using Flow.
Step 1: Create a flow that queries for Data 360 data
Create a new flow
In Setup, search for Flow in Quick Find and select Flows.
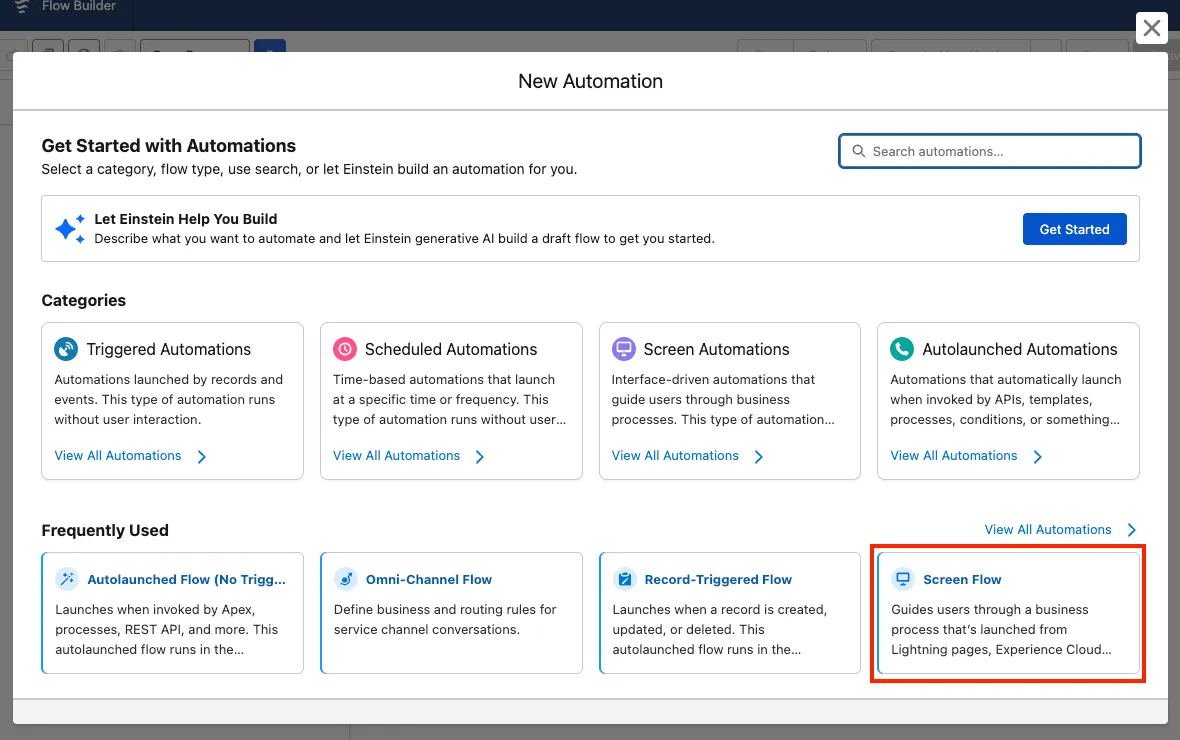
Click New Flow.
Select Screen Flow.
Open the Resources panel by clicking the sidebar icon to the left of the Select Elements button.
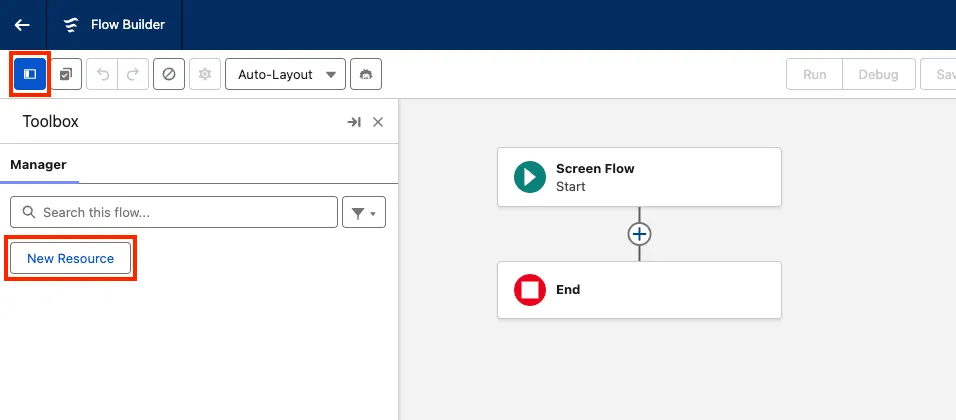
Using the New Resource button, create one variable defined as follows:
Resource Type API Name Description Data Type Available for input Available for output Variable recordIdThe Record Id that is used to query the case details and gather relevant information.Text ✅ Unchecked
Get the related Case record
Mouse over the circle under the Start element, click +, and select Get Records.
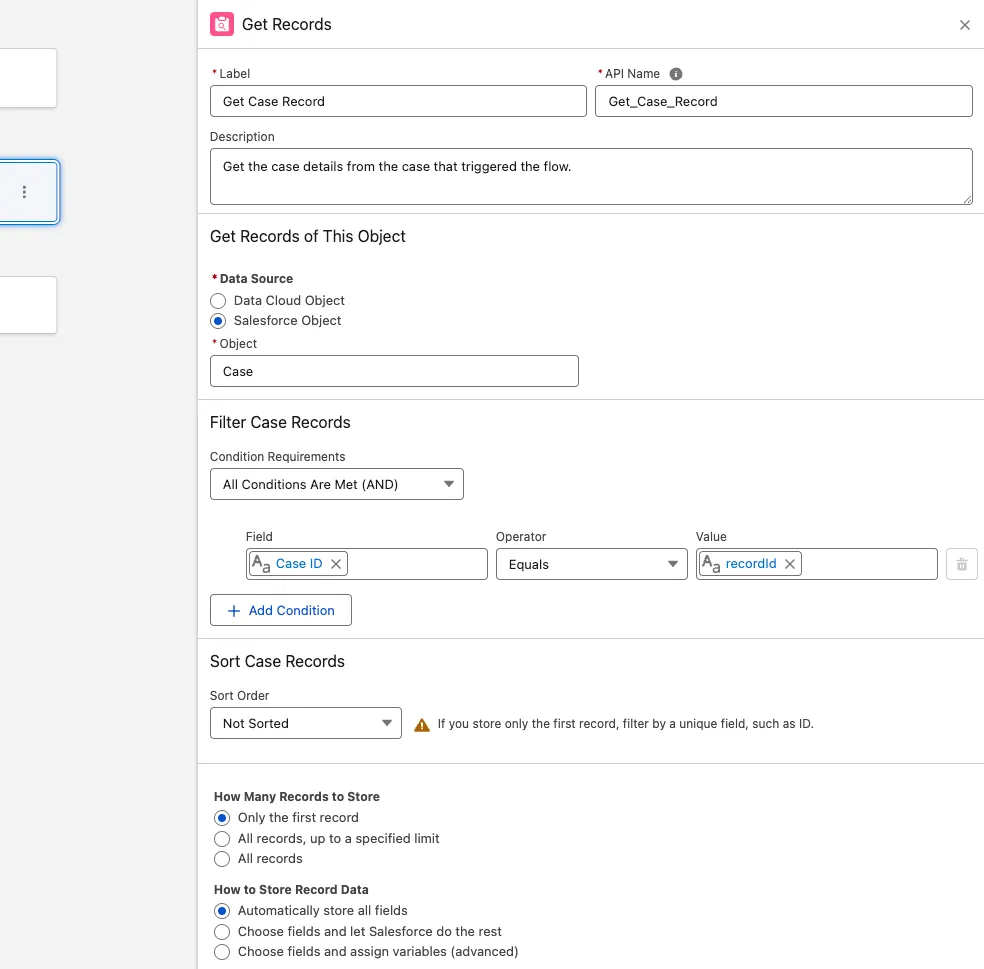
In the right panel, configure the Get Records action as follows:
Field Value Label Get Case Record API Name Keep default Description Get the case details from the case that triggered the flow. Data Source Salesforce Object Object Case Condition Requirements All Condition is Met (AND) Define the condition below:
Field Operator Value Id Equals recordId Under How Many Records to Store, leave the default value Only the first record.
Under How to Store Record Data, leave the default value Automatically store all fields.
Get the customer’s orders from Data 360
Mouse over the circle under the Get Case Record element, click + and select Get Records.
In the right panel, configure the Get Records action as follows:
Field Value Label Get Data 360 Orders API Name Keep default Description Get the most recent order for the customer using their external id. Data Source Data Cloud Object Data Space default Object Orders Condition Requirements All Condition is Met (AND) Define the condition below:
Field Operator Value Customer Id__c Equals Case from Get_Case_Record > Contact > Pronto_App_Account_Id__c Set the sort order so you get the most recent order:
Field Value Sort Order Descending Sort By Order_Date__c Under How Many Records to Store, leave the default value Only the first record.
Under How to Store Record Data, leave the default value Automatically store all fields.
Display the order details and collect task details
Mouse over the circle under the Get Data 360 Orders element, click +, and select Screen.
In the right panel, configure the Screen Properties as follows:
Field Value Label Create Task API Name Keep default Description Display order details and create task In the component sidebar, search for Display Text.
Drag the Display Text component into the screen.
In the right panel, configure the Display Text Properties as follows:
Field Value API Name Reservation_Details Set the components value as follows:
textCustomer Details Name: {!Get_Case_Record.Contact.FirstName} Lifetime Value: {!Get_Case_Record.Contact.Lifetime_Value__c} Lifetime Orders: {!Get_Case_Record.Contact.Lifetime_Orders__c} Order Details Order Date: {!Get_Data_Cloud_Orders.Order_Date__c} Order Total: {!Get_Data_Cloud_Orders.Order_Total__c} Order Id: {!Get_Data_Cloud_Orders.Order_id__c} Create Follow-up TaskIn the component sidebar, search for Text.
Drag the Text component into the screen.
In the right panel, configure the Text Properties as follows:
Field Value Label Subject API Name Subject Required ✅ Drag the Long Text Area component into the screen.
In the right panel, configure the Long Text Area Properties as follows:
Field Value Label Description API Name Description Required ✅ Click on Done to finish configuring the screen.
Create a follow-up Task
Mouse over the circle under the Create Task screen element, click +, and select Create Records.
In the right panel, configure the Create Records action as follows:
Field Value Label Create Follow Up Task API Name Keep default Description Create a follow-up task for the agent to help resolve the customer’s order issue. How to Set the Record Field Values Manually (default) Create a Record of This Object Task Set the following field values from the case:
Field Value Subject Subject Description Description Due Date $Flow.CurrentDatePriority High Name ID {!Get_Case_Record.ContactId}Related To ID {!Get_Case_Record.Id}
Save and activate the flow
Click Save and configure the flow as follows:
Field Value Flow Label Create Order Follow-up Flow API Name Keep default Description This flow helps service agents create a follow-up task using CRM + Data 360 order context. Click Save.
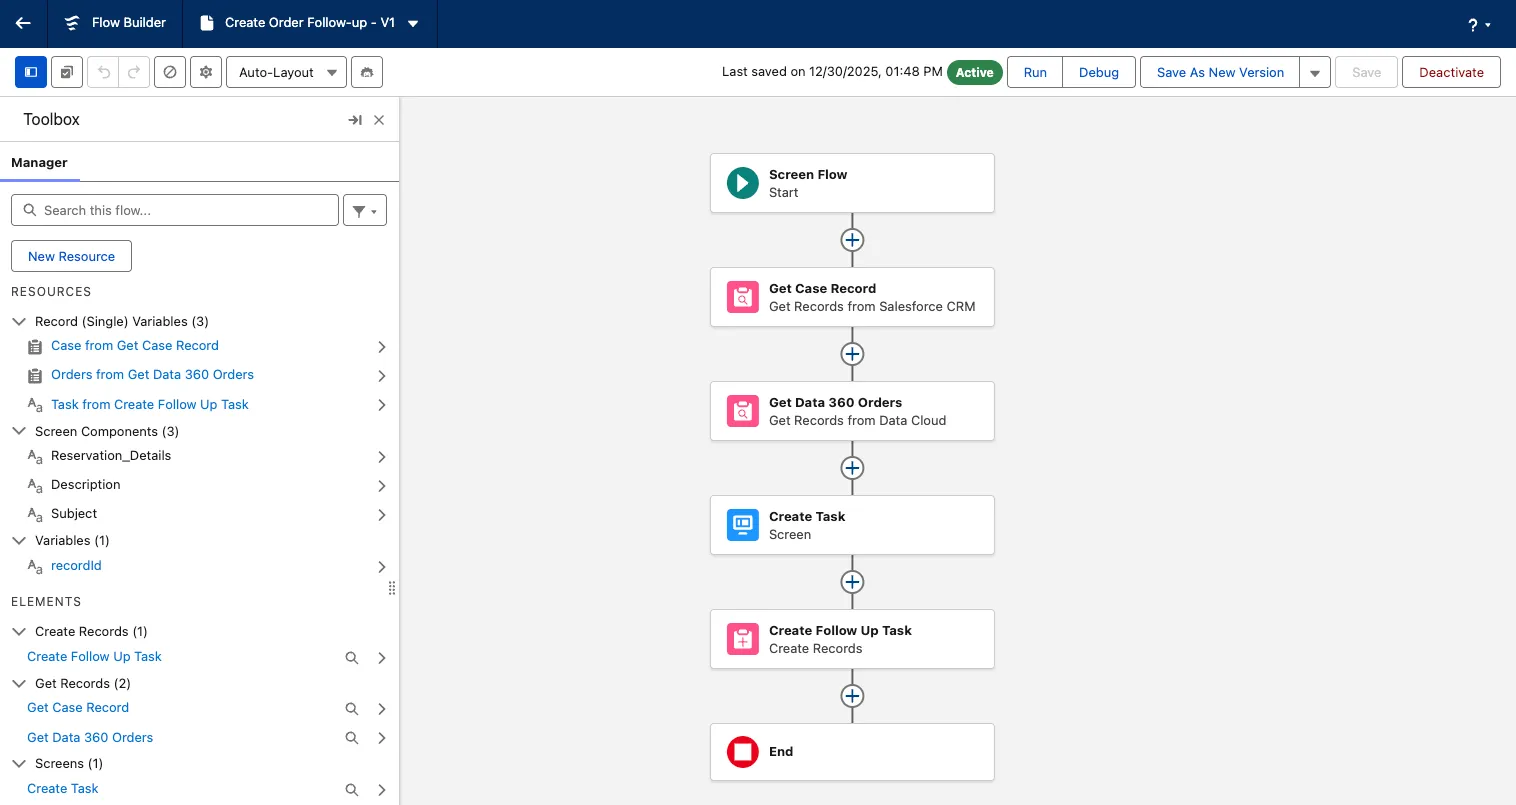
Click Activate.
Your flow should look like the following:
Click the back arrow button to leave Flow Builder and go back to Setup.
Step 2: Create a flow quick action
In Setup, Click on the Object Manager Tab.
Select the Case object.
Click on Buttons, Links, and Actions in the sidebar.
Click on New Action.
Configure the action as follows:
Field Value Action Type Flow Flow Create Order Follow-up Label Create Follow-up Task Name Leave the Default Value Description Create an order follow-up task from the case record page Click on Save.
Step 3: Add the flow to the Case Record page
In the App Launcher, open the Customer Support app, click the Cases tab, and open any order-related case (for example, a missing items or refund request case).
Click the Setup icon and select Edit Page.
Click on the Highlights Panel component.
In the component Properties, click on Add Action.
Add the Create Follow-up Task action.
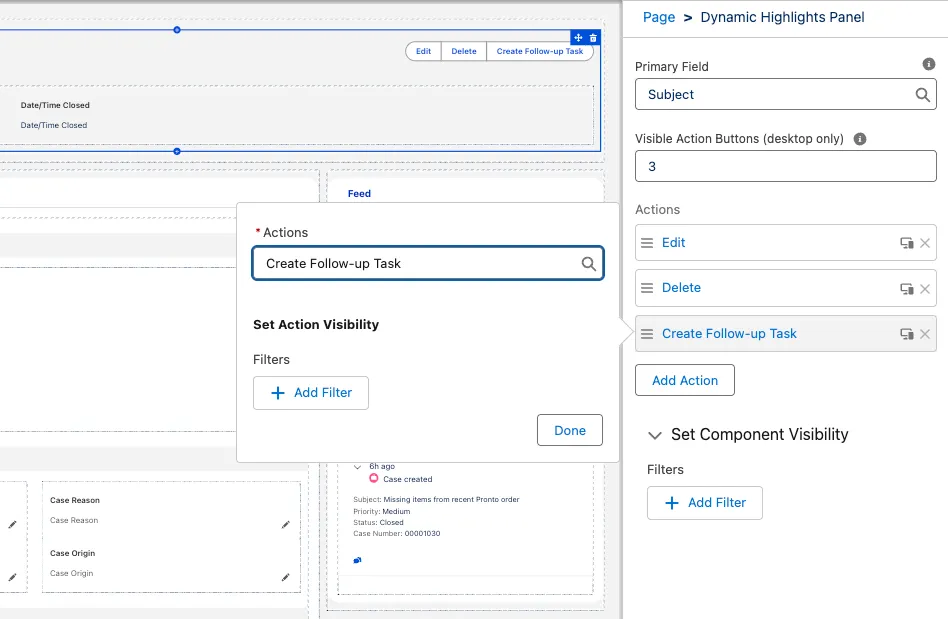
Click on Done.
Drag it to the top of the action list.
Save the Record page.
Click the back arrow button to leave Lightning App Builder and go back to the Case page.
Step 4: Test the flow
Click on the Create Follow-up Task action.
Complete the flow screen as follows:
Field Value Subject Follow up: Order issue investigation Details Customer reported an issue with their order. Review the most recent order details and coordinate the next steps (refund/replacement). Click on Done.
Summary
In this exercise, you used Flow to query CRM and Data 360 data and bring them both together to create a task.