
Appearance
Exercise 6: Access Unified Data from Salesforce
In this exercise, you’ll bring unified Data 360 data into Salesforce by adding Orders related lists to the Contact record page.
TIP
You can continue with this exercise, but data will not appear in the related list you create until the identity resolution job you started in the previous exercise completes.
Step 1: Create a Data Cloud Related List for Orders
In this step, you’ll create a Data Cloud Related List to display Orders on the Salesforce Contact record page.
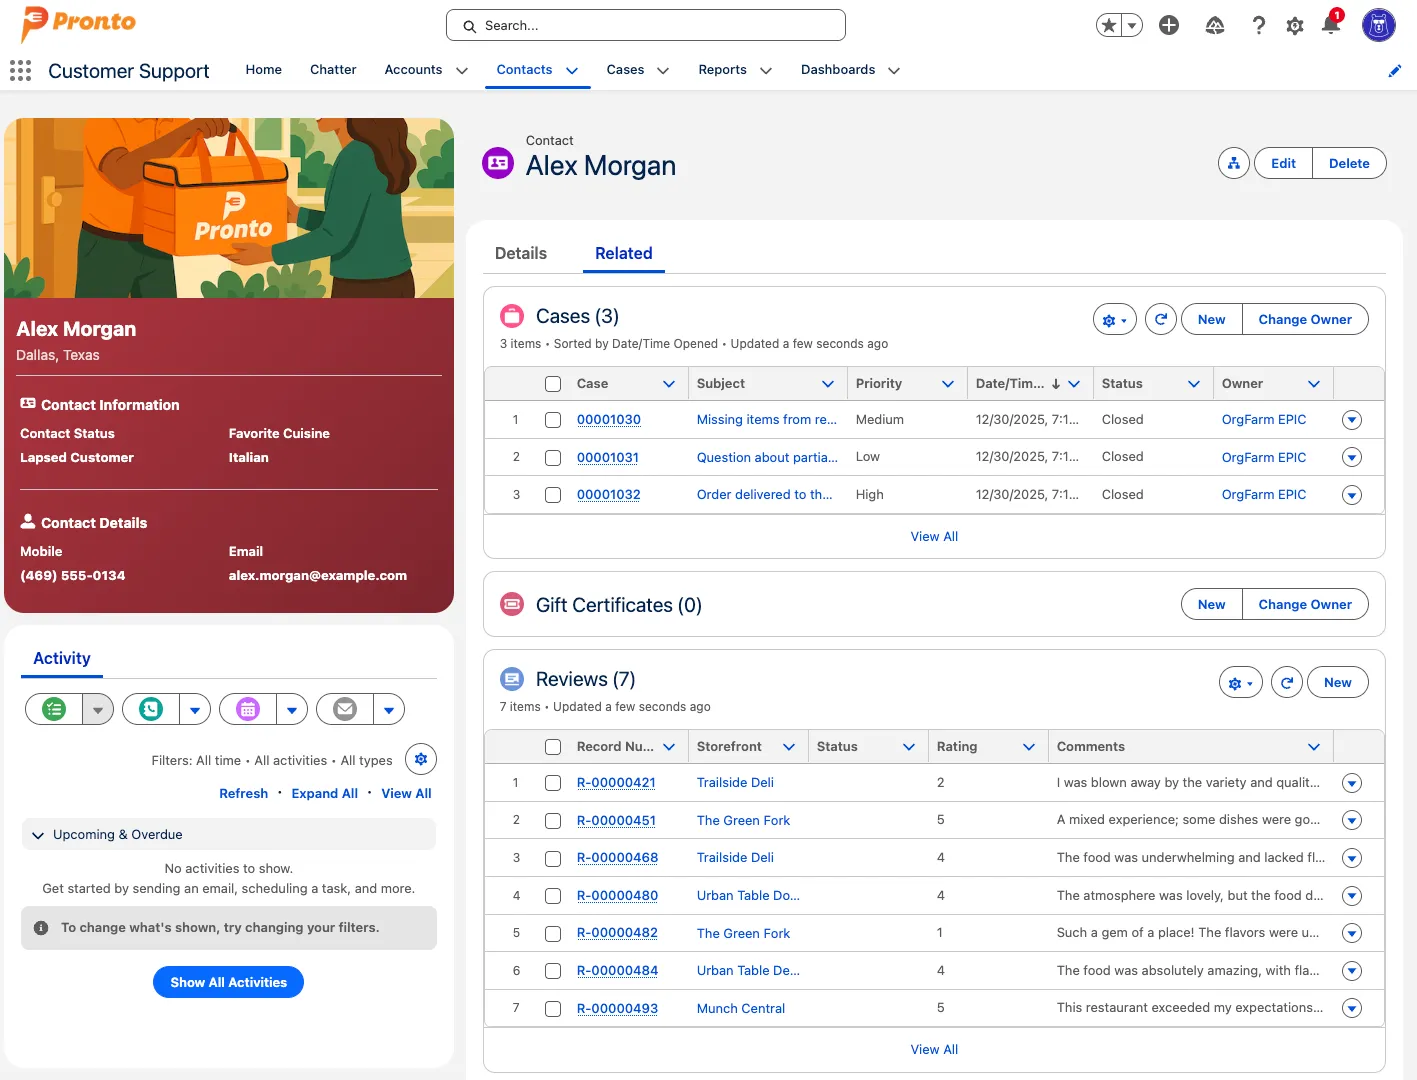
Using the App Launcher, open the Customer Support application.
Search for Alex Morgan, and click the Alex Morgan Contact Record.
Click the Related tab. Notice that there is currently no related list for Orders.
Open the Setup menu and click Edit Object.
Click Data Cloud Related List in the left sidebar.

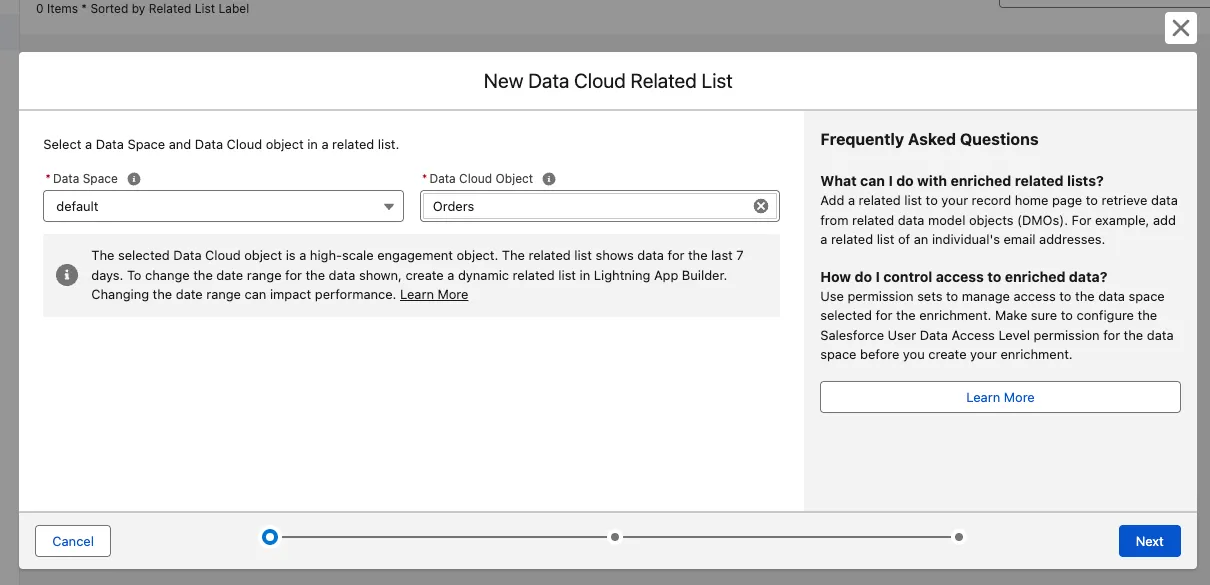
Dismiss the pop-up and click New.
In the Data Cloud Object field, select the Order object, and click Next.
Keep Orders as the Child Relationship Name, and click Next.
Change the Related list label to Orders (plural).
Check the Contact Layout checkbox.
Check the Add related list to users’ existing record page customizations checkbox.
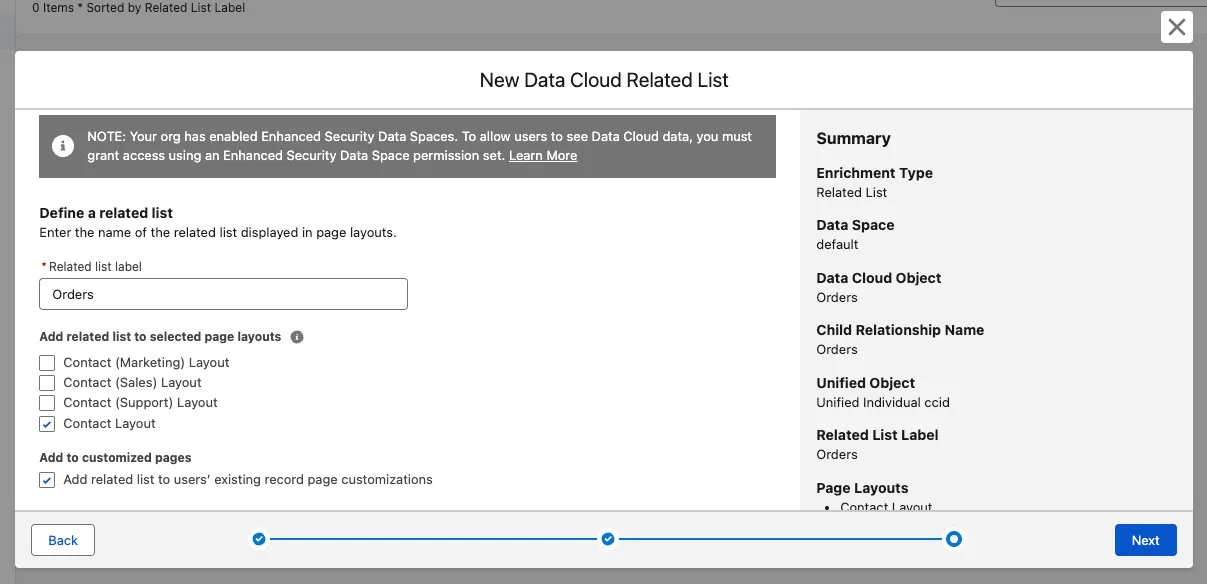
Click Next.
Step 2: Add the related list to the Contact page layout
Click Page Layouts in the left sidebar.
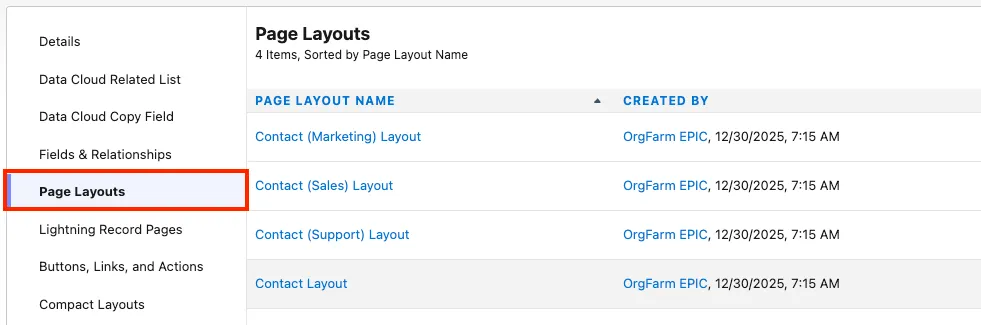
Click Contact Layout.
Scroll to the bottom of the page layout until you see the Orders related list.
Click the wrench icon.
Add the following fields to the Selected Fields:
- Order ID
- Restaurant Name
- Total Amount
- Order Date
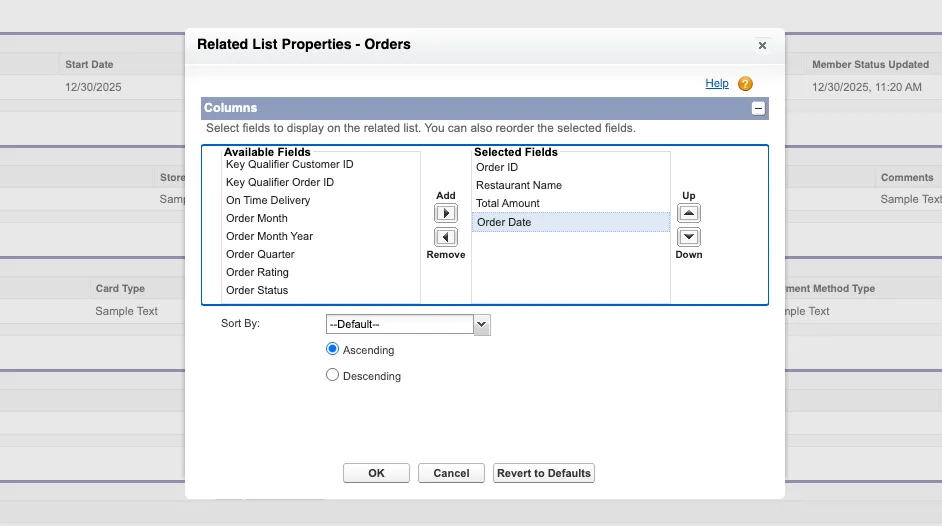
Click OK to save your field selection.
Click Save to save your changes to the Page Layout.
Step 3: Create a dynamic related list
In this step, you’ll add a dynamic related list to the Contact record page. Dynamic related lists allow you to specify custom filters and control how much data is returned by Data 360.
Make sure you’re on the Contact record page for Alex Morgan.
Open the Setup menu and click Edit Page to open App Builder.
Click the Related tab.
Drag the Dynamic Related List - Single component to the top of the page under the Related tab.
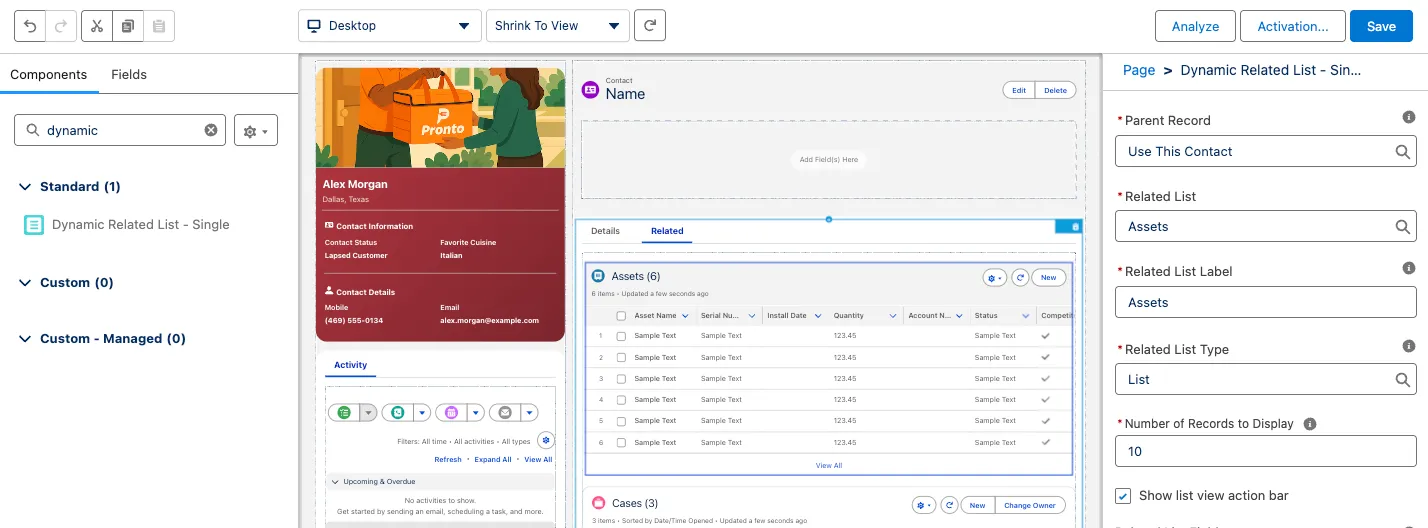
Make sure the Dynamic Related List component is selected. In the Related List field (right sidebar), select Orders.
Under Related List Fields, click the Add Field button, select the Restaurant Name field and click Done.
Repeat the previous step to add the following fields:
- Total Amount
- Order Status
- Order Date
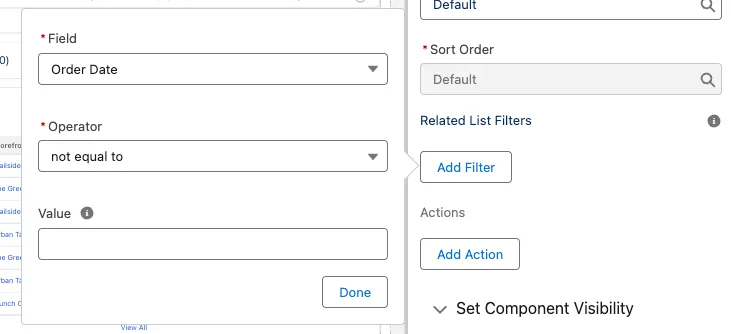
Under Related List Filters, click the Add Filter button and add the following filter:
- Field = Order Date
- Operator=not equal to
- Value=<leave blank>
TIP
If you don’t specify a filter, only the last seven days worth of data will be shown. For most contacts, this would result in an empty related list.
Click Done.
Click Save (upper right corner) to save your changes to the page.
Click the back arrow button (upper left corner) to leave App Builder and go back to the Contact record.
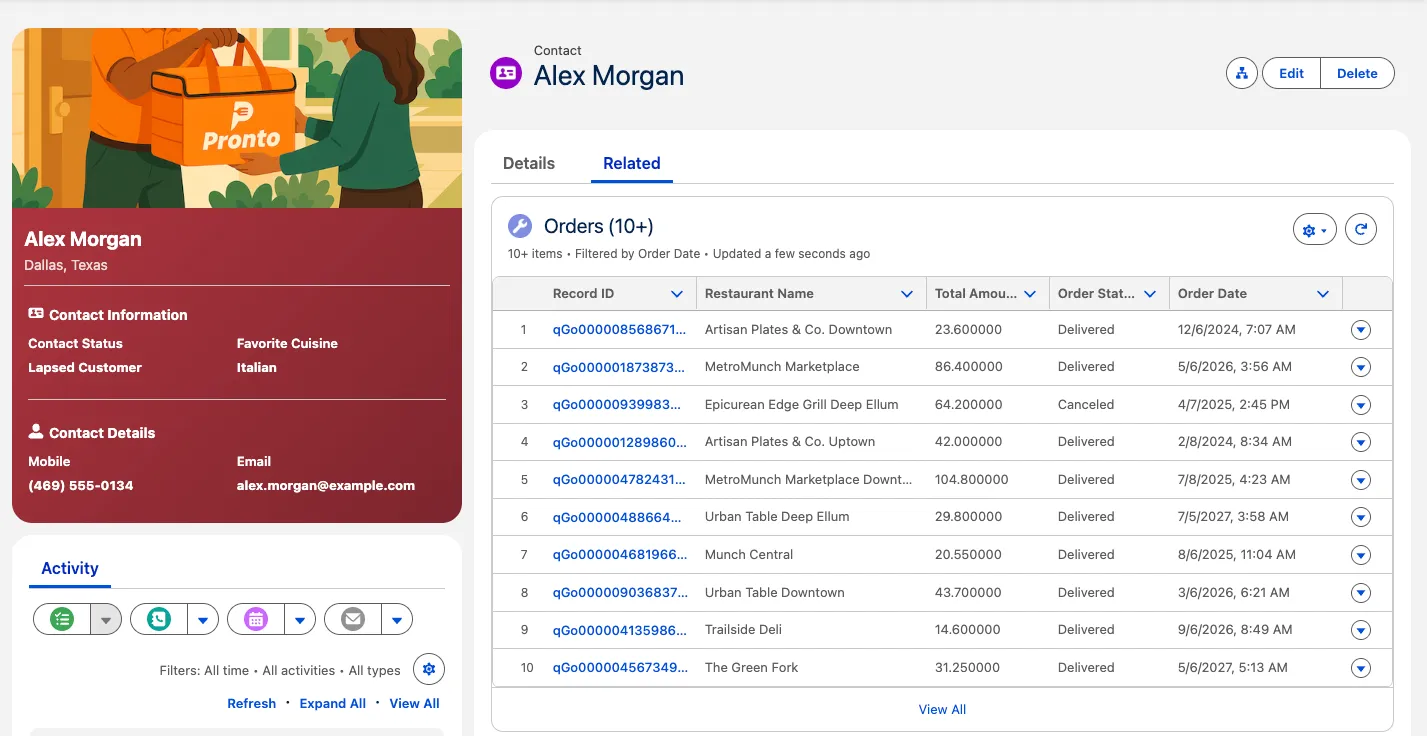
On the Contact record page, click the Related tab.
Make sure that you can see the Orders dynamic related list. This time, the list shows all the order records for Alex Morgan.
Summary
In this exercise, you added an Orders related list to Salesforce Contacts and configured a dynamic related list to display Data 360 order data on the Contact record page.