


Health Cloud Administration
 j
jAppointment Guidance Flow Example
Appointment Guidance is a custom created screen flow and the simplistic example below is
provided to show the basic steps. The example flow shows how to retrieve data from the patient
record if the Intelligent Appointment Management console is on the patient account page. Then the
example shows how to create a screen with a simple yes and no question. Finally, it shows how to
set a standard output variable in the flow to set provider preferences in the console.
| Available in: Enterprise and Unlimited Editions with Health Cloud |
| User Permissions Needed | |
|---|---|
| To open, edit, or create a flow: | Manage Flow |
For this example it’s assumed that the Intelligent Appointment Management component is located on the patient’s account record page. The Healthcare Provider record has provider gender field completed. Also, that there’s a visit type record named Annual Visit.
The appointment guidance example flow is only for illustrative purposes. Following these instructions creates a working flow, but it must be customized to fit your use case.
- From Setup, in the Quick Find box, enter Flows, and then select Flows.
- Click New Flow.
- Select Screen Flow, then click Create.
-
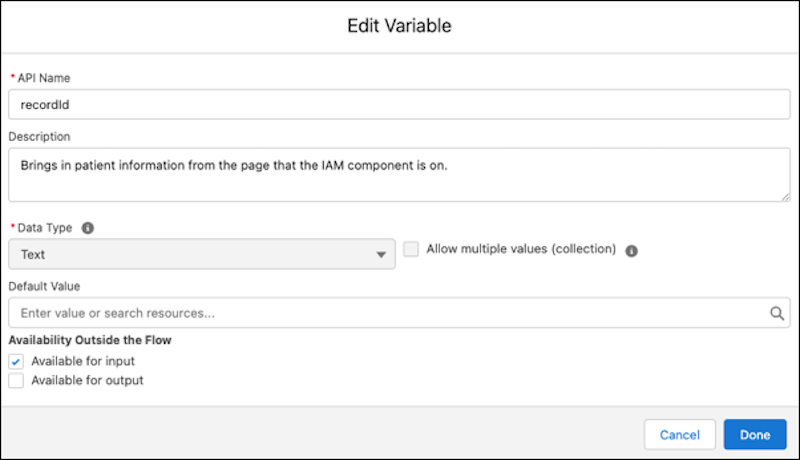
Create a variable to input patient record information into the flow:
- From the toolbox, click Manager.
- Click New Resource.
- For Resource Type, select Variable.
- Input recordId for API Name.
- In the Data Type field, select Text.
- Select Available for input.
- Save your work by clicking Done.
-
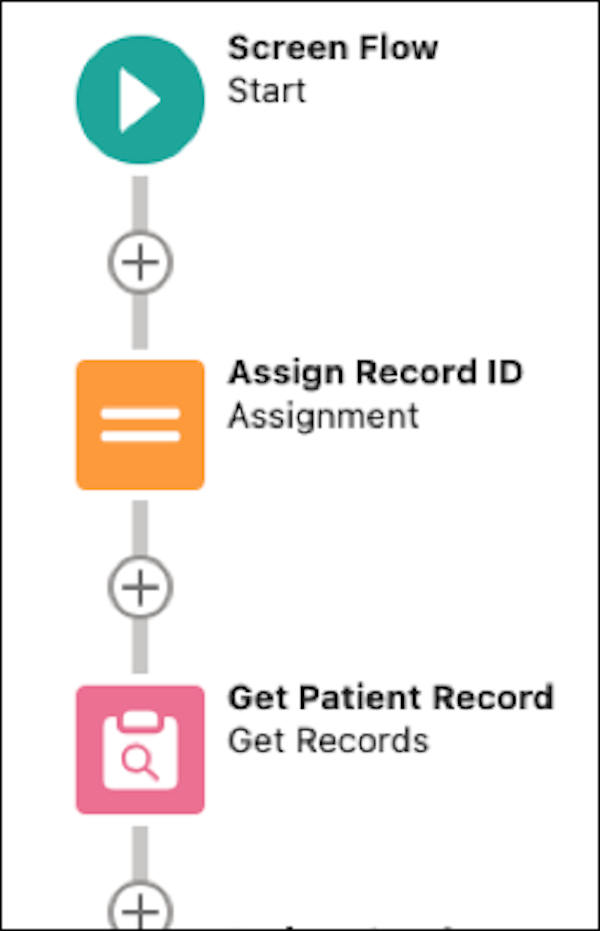
Assign recordId to a variable:
- From the flow canvas, add an Assignment element.
- Enter a label, for example Assign Record Id.
- In the Variable field select the recordId variable you created.
- In the Operator field select Equals.
- In the Value field select Account from the Record (Single) Variables section, then select Id.
- Save your work by clicking Done.
-
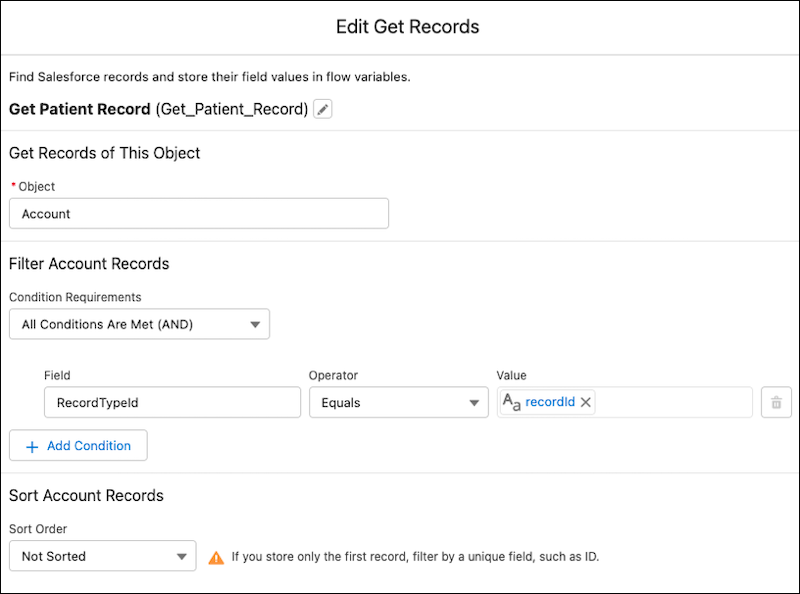
Get records for the Patient:
- From the flow canvas, add a Get Records element.
- Enter a label, for example Get Patient Record.
- In the Object field select Account.
- In the Filter Account Records Condition Requirements select All Conditions are Met (AND).
- In Field, type Id, then select Id.
- In the Operator field select Equals.
- In the Value field select recordId from the Variable section.
- In How Many Records to Store select Only the first record.
- In How to Store Record Data select Automatically store all fields.
- Save your work by clicking Done.
-
Use patient record to make a decision:
- From the flow canvas, add a Decision element.
- Enter a label, for example Visit Type.
-
In the Outcome Details section use the fields retrieved from the record to create the
different branches of the decision. For example, in the resource field you could retrieve the
patient’s gender from the patient record. One outcome could be for the gender of female,
another for male, and the Default Outcome is when neither is selected in the patient’s
record.
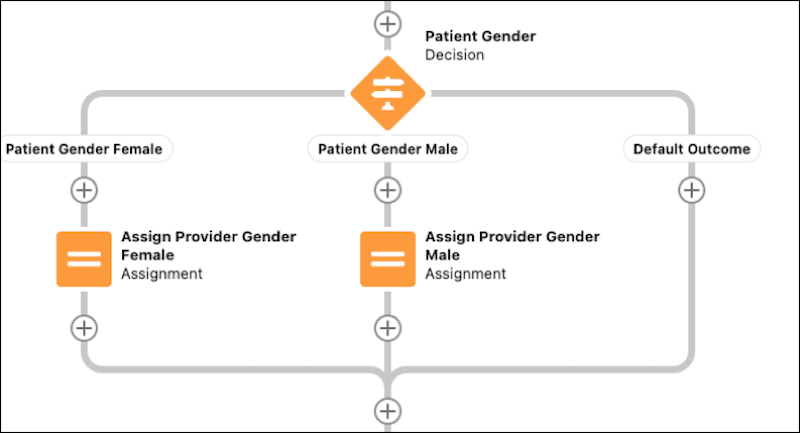
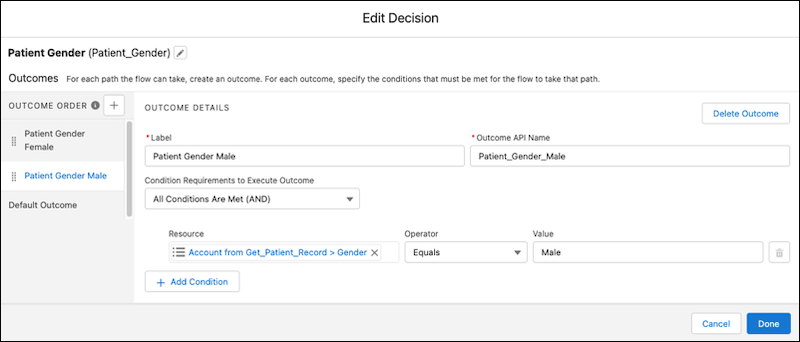
- For this example, assign the provider gender based on the patient gender.
- Save your work by clicking Done.
-
Create a screen to ask a question:
- In the flow Canvas, add a Screen Element.
- Enter a Label. This label is for the name of the question, not the actual question. API name is automatically populated.
- Create a question by clicking and dragging components to the screen.
-
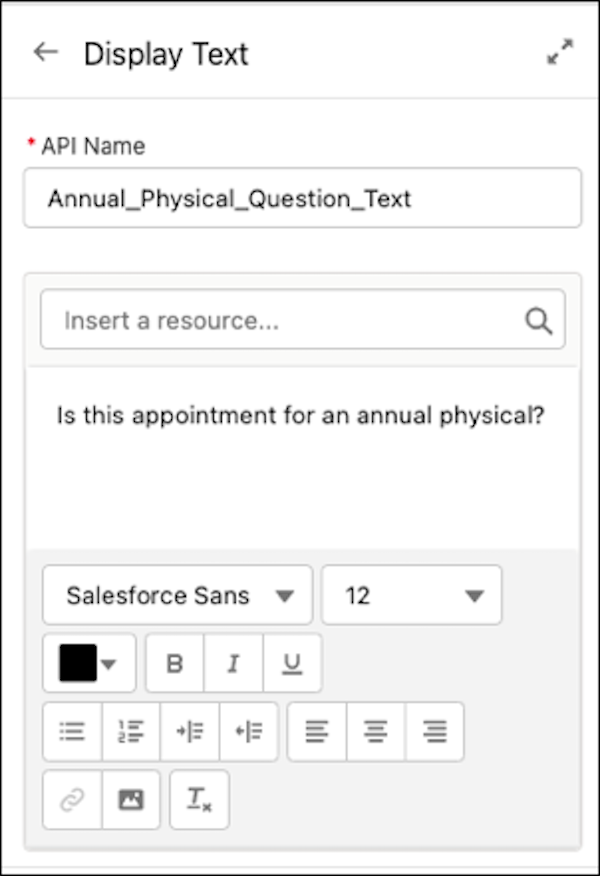
Add a Display Text component to display the question text “Is this appointment for an
annual visit?”.
-
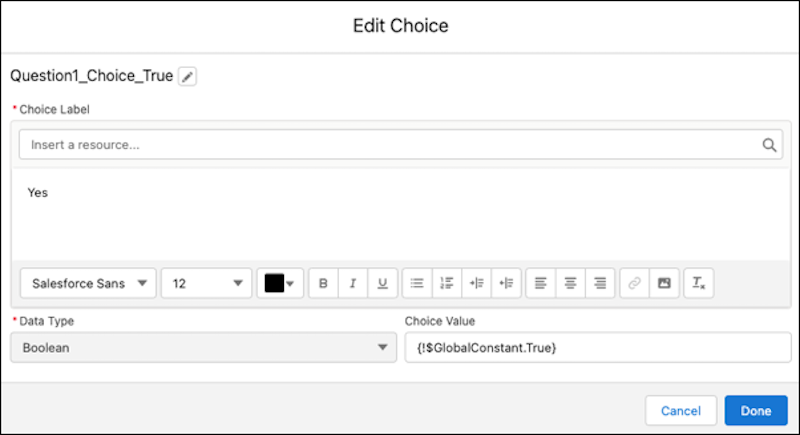
Add a Picklist component with a “Yes” and “No” choice for the call center agent to input
the reply.
- Save your work by clicking Done.
-
Use answers from a screen to make a decision:
- From the flow canvas, add a Decision element.
- Enter a label, for example Visit Type.
-
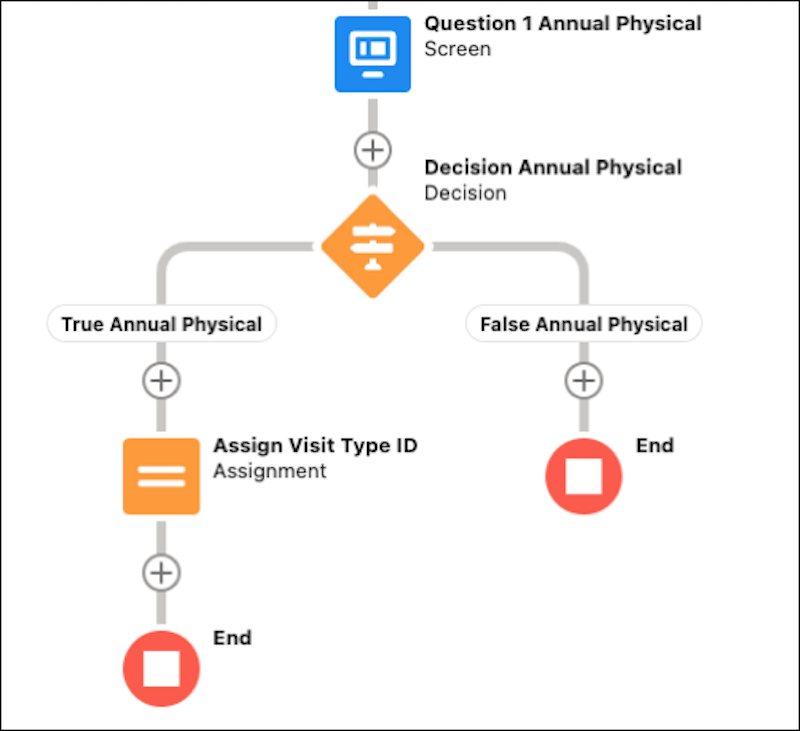
In the Outcome Details section, use the fields retrieved from the answers to the screen
flow questions to create the different branches of the decision. For example, if the patient
answered “yes” to the question “Is this an annual physical?” then you’d assign the visit type
of annual physical. In this example the value for the work type annual physical is hard coded
by entering the record value.
-
Create variables to output provider preferences at the conclusion of the flow:
- From the toolbox, click Manager.
- Click New Resource.
- For Resource Type, select Variable.
-
Enter the Flow Output Variable Name listed in the table for API Name. For this example,
we’d create VisitTypeId and ProviderGender.
Table 1. Standard Fields for Use in Appointment Guidance Flow Flow Output Variable Name Provider Preference Field Name ProviderName Provider Name FacilityName Facility Name Specialty Specialty VisitTypeID VisitType ProviderGender Provider Gender LanguagesSpoken Language Spoken Channel Channel - In the Data Type field, select the data type of the field.
- Select Available for output.
- Save your work by clicking Done.
- Repeat these steps for each output variable you plan to use to set filters in the provider preferences panel.
-
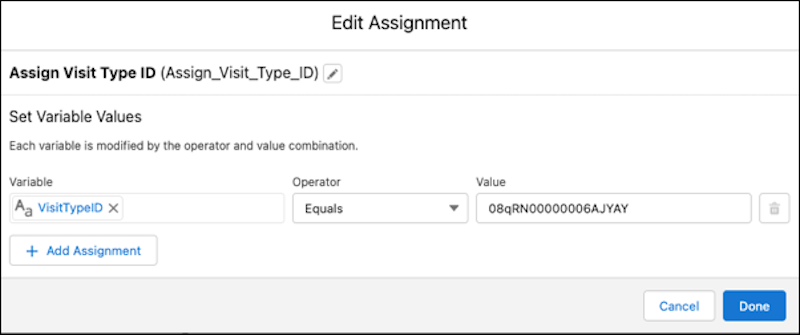
Assign values to output variables:
- From the flow canvas, add an Assignment element.
- Enter a label, for example Assign Visit Type.
- In the Variable field select the VisitTypeId variable you created.
- In the Operator field select Equals.
- In the Value field, type in the value you want to use to set the filters in the provider preferences panel.
-
Save your work by clicking Done.
-
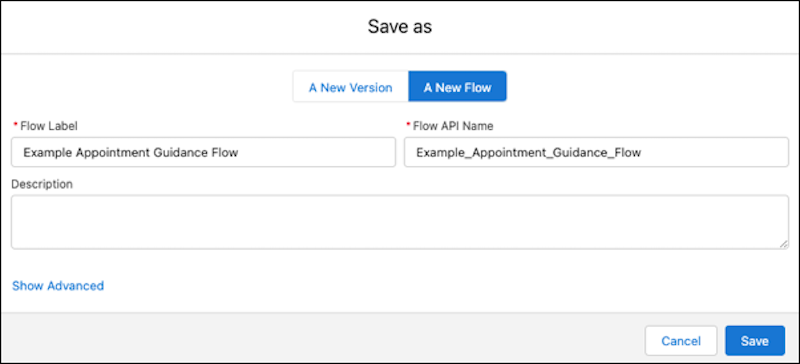
Save and Activate the flow.
-
Give call center agents and care coordinators access to the Appointment Guidance
flow:
- From Setup, in the Quick Find box, enter Flows, and select Flows.
-
Click
 next to your appointment
guidance flow, then click Edit Access.
next to your appointment
guidance flow, then click Edit Access.
- Select Override default behavior and restrict access to enabled profiles or permission sets.
- Move the Call Center Agent and Care Coordinator profiles to the Enabled Profiles list.
- Save your work.