
Appearance
Exercise 3: Manage Cases with Flow Actions
So far your agent only reads and analyzes. In this exercise, you'll add the agent's write operations (managing support cases) using three custom Flow actions: Escalate_Case, Add_Case_Comment, and Close_Case, which have already been built and deployed to your org. Because these change records, you'll also require user confirmation before they run, and add escalation reasoning so the agent checks a case's current state before deciding whether to escalate it.
Step 1: Create a new agent version
Because you activated the agent at the end of the previous exercise, the active version is now locked. Create a new version so you can make changes.
In Agentforce Builder, open the Merchant Account Manager Agent.
Click the version dropdown in the top right and select New Version (or Create New Version).
Confirm to create the new draft version. You'll make all of this exercise's changes in this version.
Step 2: Create the Case Escalation & Follow-up subagent
In Agentforce Builder, click the + sign besides Subagents and select Create new subagent.
Set the following values:
Field Value Name Case Escalation & Follow-upDescription Help account managers manage support cases tied to their merchant accounts, reporting on case metrics, and escalating, commenting on, or closing cases on request.Click Create and Open.
Paste the following into the Instructions section:
txtHelp the account manager manage cases related to their merchant accounts. Use query and aggregate actions to report on cases (open cases, counts by priority, escalated cases per account) and get-details to read a specific case. When the user asks to escalate, comment on, or close a case, resolve the case by its case number and run the matching flow action. Always confirm the case and the action with the user before performing any write.Click Save.
Step 3: Add read actions for case reporting
With the Case Escalation & Follow-up subagent selected, click the plus icon besides Actions and select Add from standard actions.
Add the following standard actions:
Identify Record by NameQuery RecordsQuery Records with AggregateGet Record DetailsSummarize Record
Click Save, then test the read side in Preview:
txtShow me all open cases for my accounts. How many escalated cases do I have by priority?
Step 4: Add the Escalate Case flow action
With the Case Escalation & Follow-up subagent selected, click the plus icon besides Actions and select New Action.
Set the following values:
Field Value Name Escalate CaseDescription Escalates a support case when a merchant issue needs urgent attention.Reference Action Type FlowReference Action Escalate Case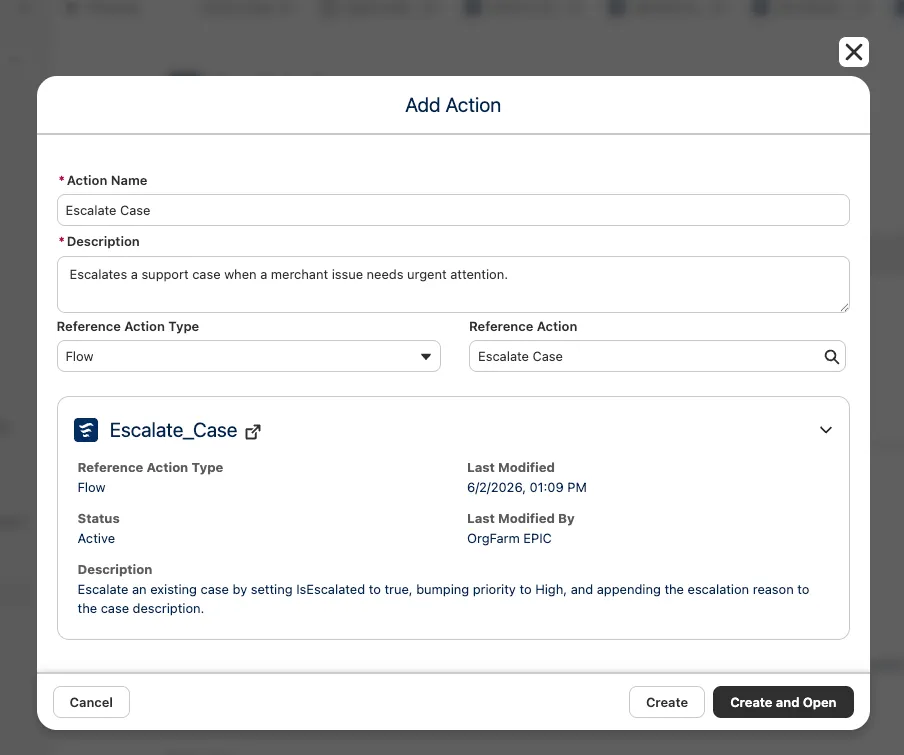
Click Create and Open.
Click Save.
Update the following Inputs and Outputs:
Field Value Inputs - Case Id Select checkbox Require Input to execute actionOutputs - resultMessage Select checkbox Show in conversationUnder Additional Settings (Configure advanced functionality for this action), turn Require user confirmation on.
TIP
Because this action changes records, Require user confirmation makes the agent restate the case and the intended change and wait for approval before executing the flow. This is an important guardrail for any write operation.
Click Save.
Step 5: Add the Add Case Comment flow action
With the subagent selected, click the plus icon besides Actions and select New Action.
Set the following values:
Field Value Name Add Case CommentDescription Adds an internal comment to a support case.Reference Action Type FlowReference Action Add Case CommentClick Create and Open.
Click Save.
Update the following Inputs and Outputs:
Field Value Inputs - Case Id Select checkbox Require Input to execute actionInputs - Comment Body Select checkbox Require Input to execute actionUnder Additional Settings, turn Require user confirmation on.
Click Save.
Step 6: Add the Close Case flow action
With the subagent selected, click the plus icon besides Actions and select New Action.
Set the following values:
Field Value Name Close CaseDescription Closes a support case that has been resolved.Reference Action Type FlowReference Action Close CaseClick Create and Open.
Click Save.
Update the following Inputs and Outputs:
Field Value Inputs - Case Id Select checkbox Require Input to execute actionInputs - Close Reason Select checkbox Require Input to execute actionOutputs - Confirmation Select checkbox Show in conversationUnder Additional Settings, turn Require user confirmation on.
Click Save.
Step 7: Add the CaseIsEscalated variable
Confirmation stops the agent from acting without approval, but it doesn't stop it from doing the wrong thing, such as re-escalating a case it already escalated earlier in the conversation. To guard against that, add a variable that tracks whether the case in context has been escalated.
Click Variables in the explorer.
Click the New dropdown and select Create a Custom Variable.
Enter the following:
Field Value Name CaseIsEscalatedAPI Name CaseIsEscalatedData Type BooleanDescription Whether the case currently in context has been escalatedDefault Value FalseEnable API write access Select checkbox 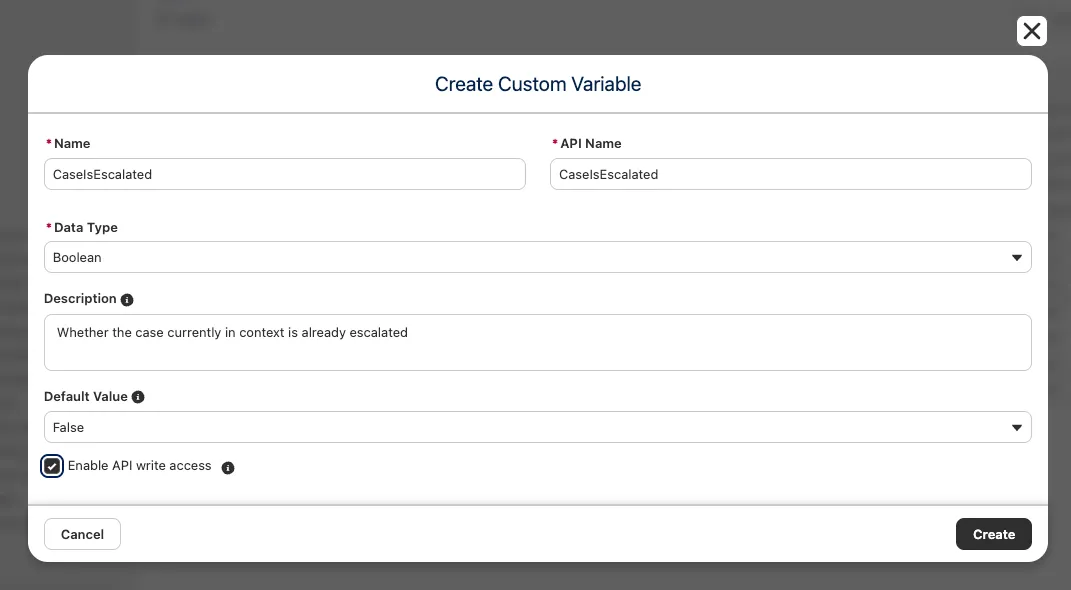
Click Save.
Step 8: Set CaseIsEscalated when a case is escalated
Get Record Details returns the full case record but can't write individual fields into a variable. Instead, set the flag with a follow-up action that runs right after the Escalate Case action succeeds.
In the explorer, open the Case Escalation & Follow-up topic.
Find the Escalate Case action, hover over it, and select Follow-up action.
Select Set Variable.
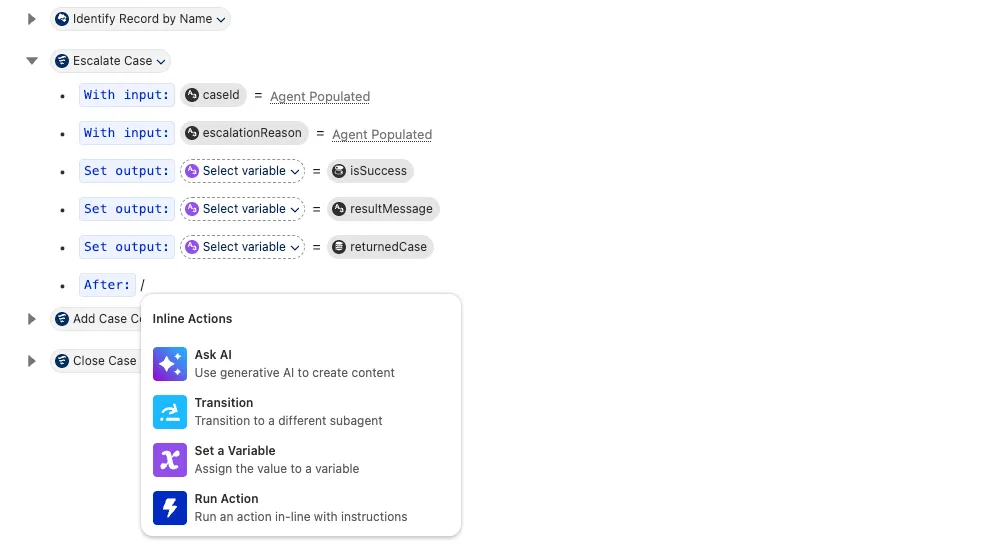
Set
CaseIsEscalatedtoTrue.
Click Save.
TIP
The follow-up action runs automatically after Escalate Case completes, flipping
CaseIsEscalatedtoTrueso the agent won't escalate the same case twice in a conversation.
Step 9: Add conditional escalation logic
Now add the branching logic to the subagent instructions so the agent decides how to handle an escalation request based on the case's state.
In the explorer, open the Case Escalation & Follow-up subagent.
In the Instructions section, add the following so the agent always loads the case first:
txtWhen the user asks to escalate, comment on, or close a case, first resolve the case by its case number and run Get Record Details to load its current state before taking any action.On a new line, type
/to open the resource picker and select Conditional Statement.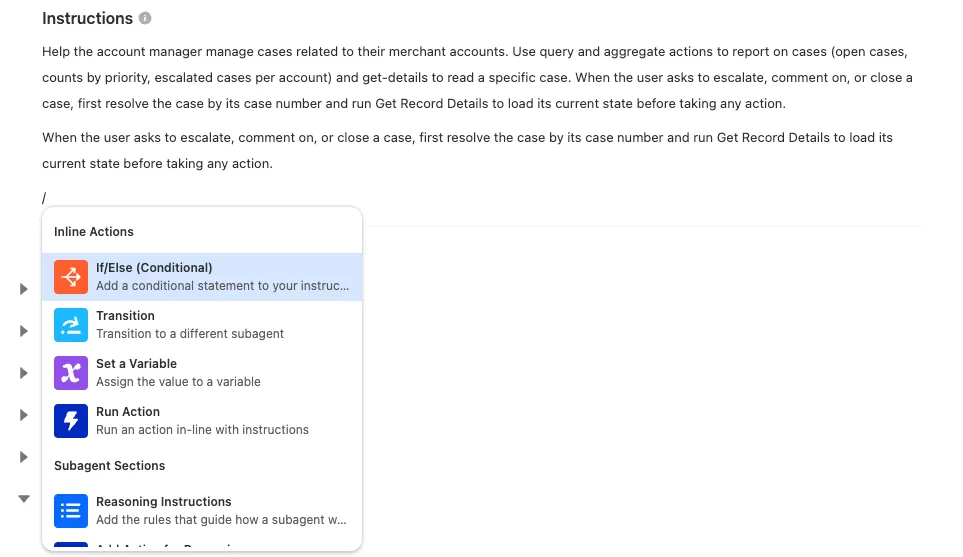
Select the
CaseIsEscalatedvariable, leave the default==operator, and set the value toTrue.Under the conditional, add the following instructions:
txtThe case is already escalated. Do not run Escalate Case again. Let the user know it is already escalated and offer to add an internal comment or close the case instead.In the Add to block pop-over, click the Else option.

Under the Else branch, add the following instructions. The priority recommendation goes here as plain instructions rather than a second conditional:
txtIf this case is high priority (CasePriority is High) and not yet escalated, recommend escalation to the user, and on confirmation run Escalate Case. Otherwise, perform the action the user requested (add a comment or close the case) after confirming with them.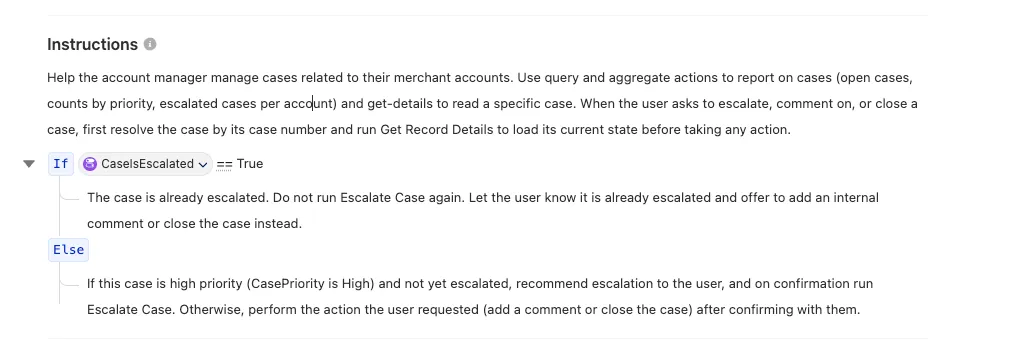
TIP
Agent Script does not support nested conditional statements. Keep the formal conditional for the escalation guard (
CaseIsEscalated), and express the priority recommendation as natural-language instructions inside the Else branch. If you ever need two formal conditions, combine them on one statement withand/orinstead of nesting.Click Save.
Step 10: Test the write actions and escalation logic
Click Preview.
Walk through a comment and a close, confirming each when prompted:
txtAdd an internal comment to case 00001036: engineering confirmed the fix is live.txtClose case 00001036. Resolved, delivery routing fix deployed.Test the escalation branching:
txtEscalate case 00001029, the merchant has been unresponsive for a week.In Interaction Details, confirm the agent:
- Runs Get Record Details to load the case before acting.
- Sets
CaseIsEscalatedtoTruevia the follow-up action after Escalate Case runs, and refuses to escalate the same case again. - Recommends escalation for a high-priority, unescalated case, then runs Escalate Case after confirmation.
Summary
- Created the Case Escalation & Follow-up subagent with both read (standard) and write (Flow) actions.
- Connected the Escalate Case, Add Case Comment, and Close Case custom Flows as agent actions.
- Enabled Require user confirmation on each write action so the agent confirms before any write.
- Tracked escalation state in the
CaseIsEscalatedvariable, set by a follow-up action on Escalate Case, and added escalation reasoning so the agent checks a case's state before escalating. - Validated the full case-management workflow, including escalation branching, in Preview.
Your agent now covers all five core topics. The remaining exercises are optional and show how you could extend this agent further with Apex, prompt templates, RAG, and Data 360.