
Appearance
Exercise 3: Create a Custom MCP Server
In this exercise, you'll create your own Custom MCP Server in Salesforce Setup, expose the Pronto case-management Flows (Escalate Case, Add Case Comment, and Close Case) as callable MCP tools, and test them in the MCP Playground alongside the Salesforce-hosted servers.
TIP
These are the same three Flows you connected to the Employee Agent in the Manage Cases with Flow Actions exercise. They have already been built and deployed to your org. Here you'll expose them through MCP instead of an agent.
Step 1: Create the Custom MCP Server
From Setup, in the Quick Find box, enter
MCP Servers, then select MCP Servers.Click the Salesforce Servers tab.
Click Create Salesforce MCP Server.
Fill in the following fields:
Field Value Label Case ManagementName CaseManagement(auto-filled)Description A custom MCP server that runs Pronto case-management flows.Click Create.
Step 2: Add Flow Tools
Click Add Server Assets and select Add Tools from the dropdown.
In the Type dropdown, select Flows.

Search for
caseand click Add Tool for these three flows:- Escalate Case
- Add Case Comment
- Close Case
Click Done.
Step 3: Activate and Copy the Server URL
Click Activate to make the server available to MCP clients.
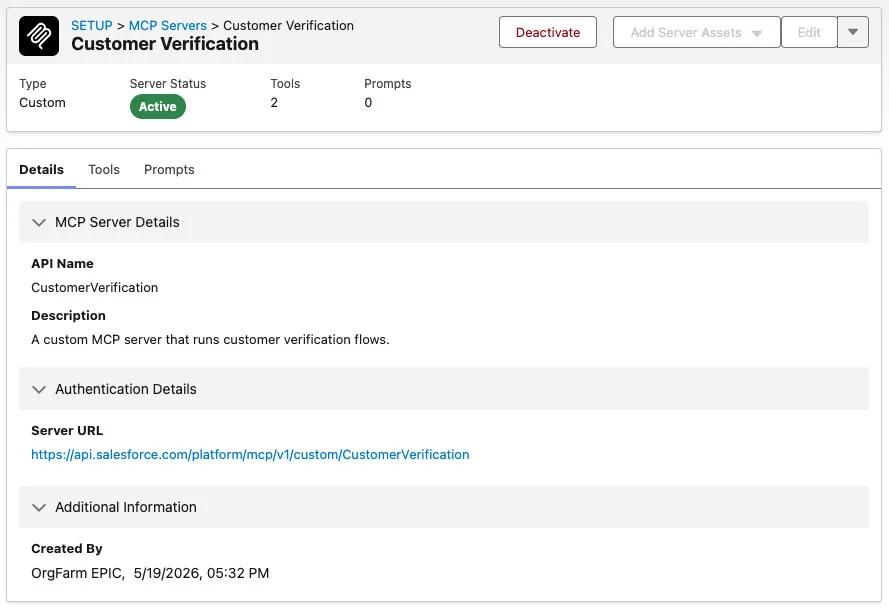
Copy the Server URL for the next step — it should be:
https://api.salesforce.com/platform/mcp/v1/custom/CaseManagement
Step 4: Add the Custom Server to the Playground
Open the MCP Playground and navigate to the Servers tab.
Paste the Server URL you copied above in the URL field.
Click Add.
Click Test to verify the server is reachable and inspect the Flow tools it exposes.
Step 5: Test the custom server
You'll combine all three servers here: use sobject-all to find a real case, then call your Case Management tools against it.
Navigate to the Chat tab.
Add the three tools from your Case Management custom MCP server to the chat context, and make sure sobject-all is also enabled.
Find an open case and its record Id:
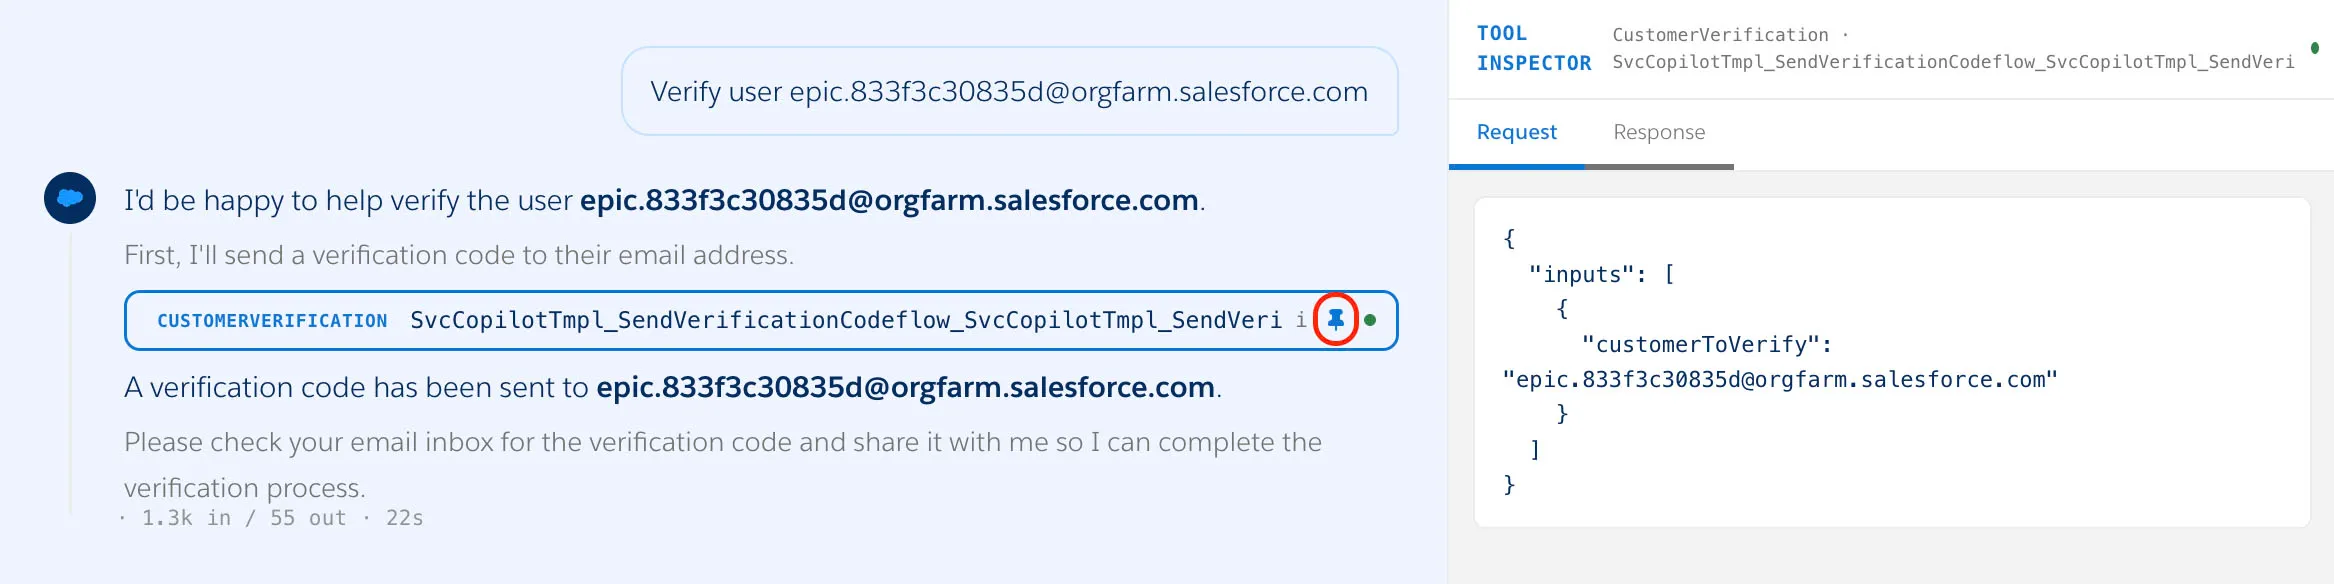
txtShow me an open case for Harvest Table Kitchens with its record Id and priority.Add an internal comment to that case, replacing
CASE_IDwith the Id from the previous step:txtAdd an internal comment to case CASE_ID: engineering confirmed the fix is live.Click the pin icon next to the MCP tool call to open the Tool Inspector, then click the Response tab to confirm the flow ran successfully.
Escalate the case:
txtEscalate case CASE_ID, the merchant has been unresponsive for a week.Close the case:
txtClose case CASE_ID with reason: resolved, delivery routing fix deployed.Use sobject-all to confirm the case now reflects your changes:
txtShow me the status, escalation flag, and latest comment for case CASE_ID.
Summary
In this exercise, you created a Custom MCP Server that exposes the Pronto case-management Flows as callable tools, and you ran them from the MCP Playground.
You now have all three servers working together — live data access, metadata context, and custom business logic — through a single natural language interface powered by Salesforce Hosted MCPs.