


Health Cloud Administration
 j
jEnable Care Coordinators to Schedule Appointments for Patients
Make the Intelligent Appointment Management console available to call center operators
or care coordinators by adding a tab to the account page layout.
|
Available in: Lightning Experience Available in: Enterprise and Unlimited Editions with Health Cloud |
| User Permissions Needed | |
|---|---|
| To use Health Cloud | Health Cloud Foundation permission set |
-
On a patient’s Person Account record page, click
 and select
Edit page.
and select
Edit page.
- In the editor, select the tab area with Related and Details tabs, then click Add Tab.
-
To rename the newly added tab, select the tab.
- Click the Tab Label field and select Custom.
- Give the tab a descriptive name, such as Make an Appointment, and click Done.
-
With the new tab selected, drag Healthcare Appointment Scheduler
from the Components panel and drop it on the tab.
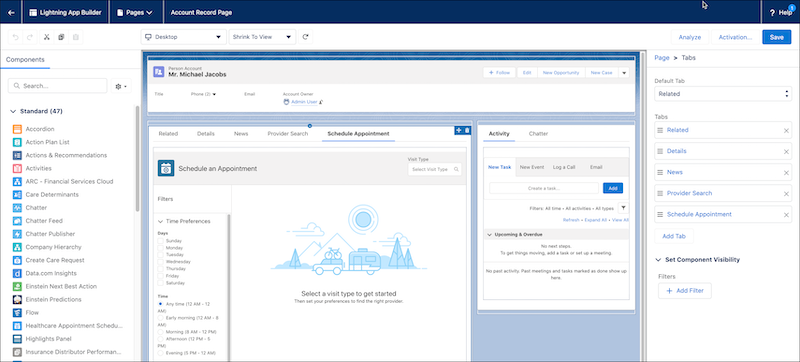 Now you can see the Healthcare Appointment Scheduler attributes.
 - Review Search Panel Fields and Advanced Search Fields and remove any fields you don't need.
- Review Search Results Fields. These fields are shown in the provider’s card. Remove any unnecessary fields.
- If you don’t want to show provider badges, clear Show Provider Badge.
- Save your changes and click Activation..
-
Select Assign as Org Default on the ORG DEFAULT tab, then click
Next, Close, and
Save.
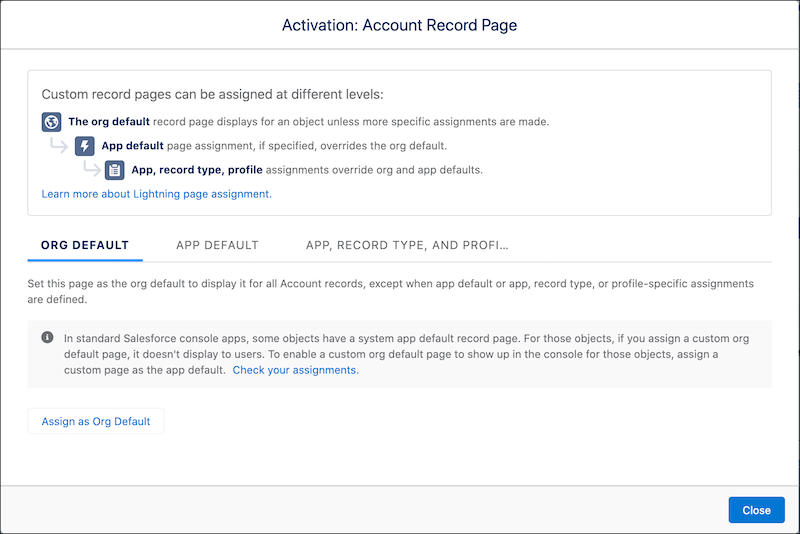
- Return to the Person Account record page.
-
To display a patient's appointments, add a Service Appointments section to the Related
List tab of the patient’s Person Account record page layout.
-
On a patient’s Person Account record page, click and select
Edit object.
- Click Page Layouts, then click Person Account Layout.
- Click Related Lists in the palette.
- Drag Service Appointments from the palette into the Related Lists section of the canvas.
- In the Related List section, clear the New button.
- Click Save, then click Yes to overwrite.
-
On a patient’s Person Account record page, click